
Emergency Roof Tarping: What to Do in the First Hour
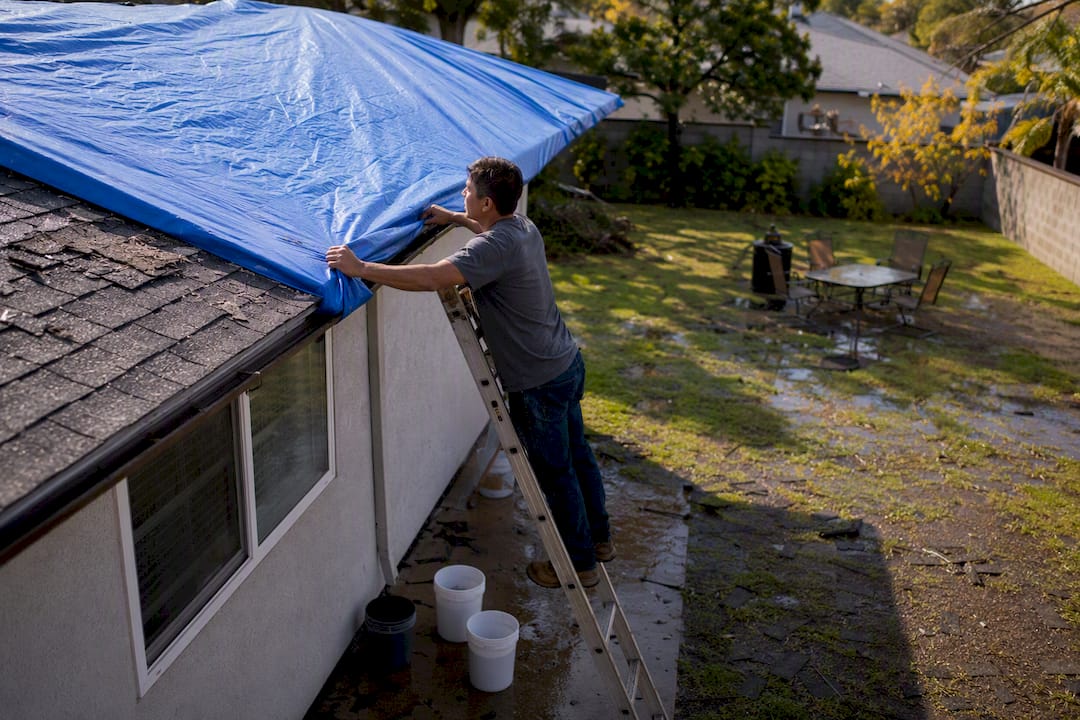
Call a credentialed emergency roof tarping contractor first. That single decision does more to limit interior damage and protect your insurance claim than anything else you can do in the first hour after a storm rips off shingles or tears open your roof deck. If your roof is steep, wet, or still being hit by wind, stay off it entirely. Instead, place buckets under active drips, move furniture and electronics away from the leak, and if it’s safe to reach your electrical panel, shut off circuits feeding any area with visible water intrusion.
Before you dial, gather a few basics: your address, a description of the visible damage, a few photos taken from a safe window or the ground, and the best phone number to reach you. A qualified contractor, like the team at Smart Roofing & Restoration, can dispatch faster and quote more accurately when you hand over that information up front.
Key Takeaways
Calling a licensed, insured emergency tarping contractor and documenting damage before covering it are the two actions that most reliably protect your home and your insurance claim.
| Point | Details |
|---|---|
| Call before climbing | Contact a licensed emergency tarping contractor first; only attempt DIY tarping on safe, low-slope, small-area damage. |
| Document before covering | Photograph all damage before the tarp goes on to support insurance reimbursement later. |
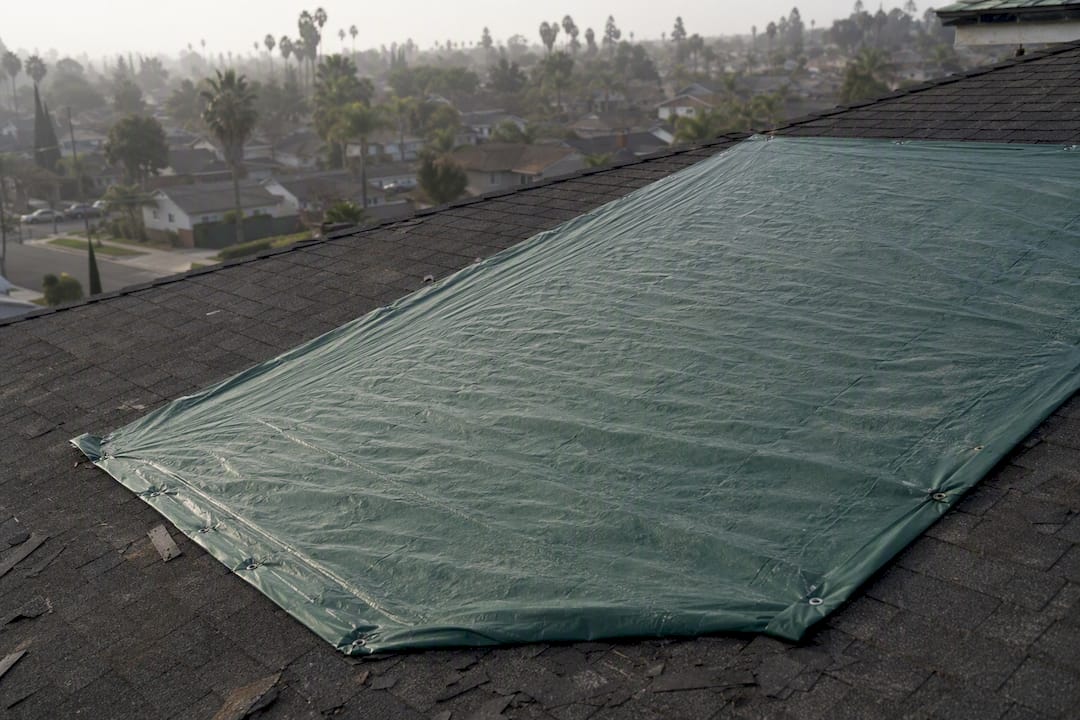
| One large tarp wins | A single heavy tarp with 3 to 4 feet of overhang outperforms multiple smaller tarps prone to seam leaks. |
| Tarps are temporary | Professional tarps typically hold 30 to 90 days, so schedule permanent repairs during that window. |
| Choose credentialed help | Smart Roofing & Restoration’s CertainTeed Premier ShingleMaster status supports documented, warranty-friendly emergency repairs. |
Table of Contents
- Deciding: When to Tarp Yourself and When to Call a Pro
- What a Professional Emergency Tarping Service Actually Does
- How to Tarp a Roof Yourself When It’s Safe
- Costs, Insurance, and Documenting the Damage
- Why Contractor Credentials Matter for Emergency Tarping
- The Real Priority Nobody States Plainly Enough
- Get Emergency Roof Tarping From a Credentialed San Diego Team
- FAQ: Emergency Roof Tarping
- Sources
Deciding: When to Tarp Yourself and When to Call a Pro
Not every roof problem calls for a ladder. The decision hinges on three things: how steep your roof is, how bad the weather still is, and how much active water is coming inside.
Call a professional immediately if any of these apply:
- Water is actively dripping or pooling inside your home.
- The roof is steep pitch or your house has two or more stories.
- The storm hasn’t fully passed, or wind gusts are still a factor.
- You see exposed wiring, a sagging ceiling, or any electrical hazard near the leak.
- The damaged area is larger than a few square feet.
Limited homeowner action makes sense only when the roof is low slope, the weather has calmed, and the damage is small and reachable from a stable, properly footed ladder. Even then, treat it as a stopgap, not a repair.
Whether you tarp or wait for help, spend the first five minutes on this ground-level checklist: document the damage with photos and video, move valuables and electronics out of the water’s path, isolate breakers only if you can do so without stepping near standing water, call your insurer and a contractor in the same window, and keep kids and pets away from the affected rooms. OSHA’s roofing safety guidance is explicit that fall protection and hazard assessment come before any roof work, and that rule applies to homeowners just as much as crews.
What a Professional Emergency Tarping Service Actually Does
A reputable emergency roof tarping service should answer the phone around the clock and commit to a same-day or overnight arrival window, though after a widespread storm, crews typically triage the worst active leaks first and work down the list from there. If you’re the fifth call on a night with fifty leaks citywide, expect a realistic ETA rather than an immediate one.
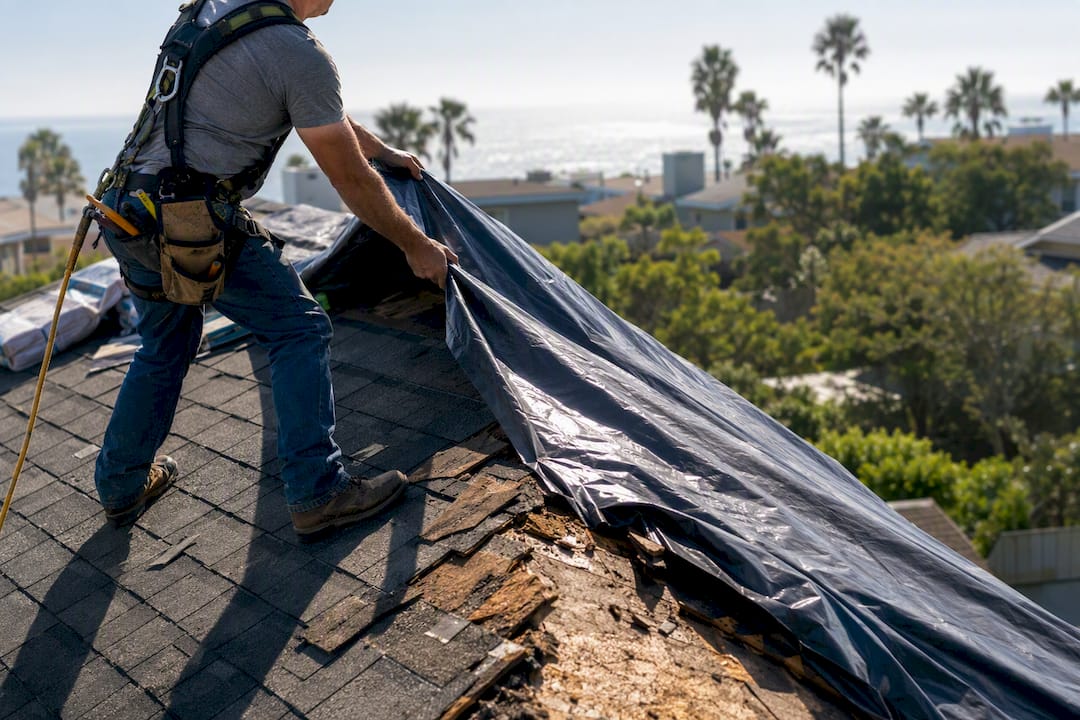
Once on-site, professionals reach for heavier material than most homeowners keep in the garage. Home Depot’s own tarping guidance recommends heavy-duty polyethylene tarps rated at least 6 mil, and most contractors carry 6 to 10 mil or heavier stock built to survive wind and standing water. Crews generally prefer one large tarp over multiple smaller ones stitched together, since seams between overlapping tarps are the most common new leak point. Anchoring matters just as much as the tarp itself: on sloped roofs, pros favor the furring-strip or “2x4 sandwich” method over loose sandbags, and on flat or low-slope roofs, sandbags or ballast placed at intervals hold the tarp without punching extra holes. Good crews also run a rope over the ridge as backup anchoring in case a screw or strip fails.
Expect a few deliverables from any legitimate service:
- Before and after photos documenting the damage and the completed tarp.
- An itemized invoice separate from any future repair estimate.
- A written estimate you can hand directly to your insurance adjuster.
- A re-inspection date, since tarps are a temporary fix, not a solution.
Before the crew hangs up, ask whether they’re licensed and insured, what their actual arrival window looks like, how they document the work for your insurer, and whether they use screw-anchored furring strips versus adhesive-only methods, since screw penetrations need to be logged for whoever handles the permanent roof repair later.
Pro Tip: If water is visibly running under the shingle courses above the hole, ask the crew whether they’ll slide a metal or heavy plastic barrier under those shingles before tarping. That extra step redirects water over the damaged zone instead of letting it wick sideways into good decking.
How to Tarp a Roof Yourself When It’s Safe
If help is delayed and conditions genuinely allow it, a careful DIY tarp job can buy you real time. This only applies to low-pitch, single-story sections reachable from a stable ladder in calm, dry weather.
Materials you’ll need:
- A heavy-duty poly tarp, 6 mil or thicker, sized to extend 3 to 4 feet beyond every edge of the damage
- Two 2x4 boards, cut a few inches longer than the tarp’s width
- 3-inch deck screws and a drill or driver
- Rope for a ridge tie-off
- Sandbags if you’re working a flat or low-slope section
The sequence:
- Measure the damaged area and add at least 3 to 4 feet of overhang on every side, following the same margin roofing how-to guides recommend for wind resistance.
- Start at the ridge or peak and drape the tarp down and over the damage, never starting mid-slope, so water flows over the tarp instead of under its top edge.
- Sandwich the top edge between a 2x4 and the roof deck, screwing through both into solid framing.
- Repeat the sandwich method on the bottom edge and pull the tarp taut before securing the sides.
- Check for pooling or slack once it’s fastened; a loose tarp fills with water and rips loose in the next gust.
- Run a rope over the peak and tie it off on both sides as backup anchoring.
Never attempt this in wet, icy, or windy conditions, and never go up alone. Bring a helper who stays at ground level, wear a harness or fall-arrest line where feasible, and photograph the damage before and after the tarp goes on. OSHA’s roofing safety bulletin warns that a poorly secured tarp can create new hazards, from wind uplift that turns a tarp into a sail to water funneling under an improperly seated edge and doing more damage than the original leak.
Pro Tip: Skip the temptation to use several small tarps if you have one large opening. A single sheet with proper overhang beats a patchwork of smaller tarps taped or nailed together at every seam.
Costs, Insurance, and Documenting the Damage
Emergency tarping typically runs cheaper for a small, ground-accessible section and climbs fast for steep, multi-story, or whole-roof jobs. After-hours and storm-surge demand also push prices up, since crews are working in the dark, in bad weather, against a long call queue. Expect the final number to reflect roof access, pitch, square footage, and how urgently you need someone on-site tonight versus tomorrow morning.
Insurers generally treat emergency tarping as a mitigation cost, and most will reimburse reasonable mitigation expenses when the underlying peril is covered, because policies obligate you to limit further damage once a loss occurs. To protect that reimbursement:
- Photograph the damage before the tarp goes on, not just after.
- Keep every receipt and itemized invoice from the tarping crew.
- File the claim promptly rather than waiting for the permanent repair estimate.
- Avoid any permanent repair work until the adjuster has inspected the damage.
- Read carefully before signing an Assignment of Benefits (AOB) document, and get advice before signing over your claim rights to a contractor.
A professionally installed tarp is generally expected to hold for 30 to 90 days depending on material weight and weather exposure, which is your real window to schedule permanent repairs. Watch for red flags that show up constantly after major storms: door-knockers offering “storm deals” who weren’t in your neighborhood yesterday, demands for large cash deposits before any work starts, pressure to sign an AOB on the spot, or an inability to produce a license and insurance certificate when asked.
Why Contractor Credentials Matter for Emergency Tarping
Roofing contractors carry. That distinction reflects installation standards across asphalt shingle, tile, and low-slope systems, and it matters during an emergency because the crew tarping your roof tonight often becomes the crew handling your permanent repair or replacement once the adjuster signs off.
Credentialed contractors document every screw penetration and anchor point during emergency work, which keeps the eventual permanent repair warranty-friendly instead of voided by undocumented modifications. That documentation trail, paired with detailed inspections and honest, on-site estimates rather than guesswork over the phone, is what separates a mitigation job that protects your claim from one that complicates it.
When you call, ask directly for license and insurance numbers, confirmed arrival timing, and how the crew documents anchor points for the insurance file. Water damage restoration needs coordinate cleanly with roofing work when a leak has already reached your interior.
The Real Priority Nobody States Plainly Enough
Most emergency tarping guides bury the actual priority under a pile of step-by-step instructions, as if every homeowner reading them is expected to climb a wet roof mid-storm. That’s backward. The research behind this guide points to a simpler truth: the single highest-leverage decision is picking up the phone, not picking up a caulk gun.
Where conventional advice falls short is in treating DIY tarping as the default and professional help as the fallback. It should be the reverse. A homeowner with a two-story roof and an active leak gains almost nothing by attempting a repair that a trained crew can execute more safely and more durably in less time. The DIY checklist in this guide exists for a narrow slice of situations, low-slope, calm weather, small and reachable damage, not as a substitute for professional judgment.
What should you prioritize first? Documentation and the phone call, in that order, before anything involving a ladder. Everything else, materials, anchoring method, cost expectations, follows from getting those two moves right.
Get Emergency Roof Tarping From a Credentialed San Diego Team
Smart Roofing & Restoration answers emergency calls with the same crew that can carry your claim through to a warranty-backed permanent repair, no handoff between a tarping outfit and a separate repair contractor. That continuity matters most in San Diego County, San Diego, Riverside, and Orange County, where coastal salt exposure and wildfire debris both complicate what looks like simple storm damage. As a CertainTeed Premier ShingleMaster, a distinction fewer than 1% of U.S. contractors hold, the team documents every anchor point during emergency mitigation so your eventual repair, whether tile, asphalt shingle, or low-slope, qualifies for manufacturer-backed warranty coverage instead of getting flagged for undocumented modifications.
If your roof is actively leaking right now, request an emergency roofing assessment and get a written estimate on-site, with no hidden costs and no pressure to sign anything before your insurance adjuster sees the damage.
FAQ: Emergency Roof Tarping
How much does emergency roof tarping cost? Costs depend heavily on roof access, pitch, size of the damaged area, and whether the job happens overnight or during a regional storm surge, when after-hours premiums typically apply. Get a written estimate before work begins whenever conditions allow it.
How long does a temporary roof tarp last? Most professionally installed tarps hold for 30 to 90 days depending on material thickness and weather exposure, which is why permanent repair scheduling should start immediately after mitigation.
Will my insurance pay for emergency roof tarping? Insurers typically reimburse reasonable mitigation costs when the underlying storm or peril is covered under your policy, provided you document the damage and keep itemized receipts.
Can I tarp my own roof after a storm? Only if the roof is low slope, the weather has fully calmed, and the damaged area is small and reachable from a stable ladder. Steep roofs, multi-story homes, active storms, and large openings all call for a professional.
What should I ask a contractor before hiring them for emergency tarping? Ask for proof of license and insurance, a realistic arrival window, how they document the work for your insurance file, and whether they use screw-anchored furring strips so penetrations get logged for your permanent roof inspection and repair.
Sources
- OSHA — Worker safety in roofing operations (OSHA3926)
- Emergency roof tarp guide | ProCraft Local
- Roofs